Showing posts with label Christmas. Show all posts

Monday, December 30, 2013

Chipotle and Rosemary Spiced Nuts

015

Merry Christmas and Happy New Year friends!  Are you enjoying the holidays so far?  I hope so!  I am sorry we have not posted as much as usual....we have all been so busy this last month.  You know how it is, I am sure!  Busy or not, I just couldn't wait another minute to share these nuts with you!  You really need to try them before the holidays are over.  They are very easy to make and would be a perfect treat to add to your table for New Years!  My sweet friend Wendy introduced me to these amazing roasted nuts and I am hooked!  They have such incredible flavors that are quite intriguing!  The first time I had them, I kept going back for more, trying to figure out all the wonderful flavors I was tasting!  Sweet and spicy, these unique nuts are  the perfect holiday treat to share!  And gluten free!  YUM!

014

Chipotle and Rosemary Spiced Nuts


Author: Melanie

Recipe Source: I got this recipe from my friend Wendy--after a little research, it looks like it is originally an Ina Garten Recipe.


Ingredients


  • 3 c whole roasted unsalted cashews

  • 2 c whole walnut halves

  • 2 c whole pecan halves

  • 1/2 c whole almonds

  • 1/3 c pure maple syrup

  • 1/4 c light brown sugar, lightly packed

  • 3 T freshly squeezed orange juice

  • 2 t ground chipotle powder

  • 4T minced fresh rosemary leaves, divided

  • vegetable oil

  • Kosher salt


Instructions


  1. Preheat oven to 350

  2. Brush sheet pan generously with vegetable oil.

  3. In a large bowl combine all nuts, 2 T vegetable oil, maple syrup, brown sugar, orange juice and chipotle powder.

  4. Toss nuts so they are evenly coated.

  5. Add 2 tablespoons rosemary and some salt and continue to toss.

  6. Spread nuts on an 11x17 cookie sheet.

  7. Roast for 25 minutes, stirring 2 or 3 times with a metal spatula.

  8. Remove and add 2 T rosemary, 2 tsp salt and toss again.

  9. Stir occasionally until cooled.


Thursday, December 5, 2013

Eggnog Muffins


022

I love this time of year with all the twinkling lights, yummy food and awesome Christmas music that is constantly on repeat in our house!  Yesterday I made these eggnog muffins and my family LOVED them! They were amazing--melt in your mouth good!  I think they would be perfect for Christmas morning or really any time this holiday season.  They come together quickly and taste so good.  Sweet and moist with the perfect touch of eggnog!  I have to admit that I couldn't wait and tried one without the glaze, fresh out of the oven with a little butter....oh my it was perfect!!  I think I may like them better without the glaze (although it was great that way too!).  So if you are looking to cut down on the sweetness you can get away with no glaze.  They are just a fantastic muffin!

I posted our all time favorite songs that are currently on our Christmas playlist here at Melandboys.  Do you have any favorites that we are missing?  I would love to add some new tunes to the rotation this year!  Please share! xo

 
eggnog Muffins

Eggnog Muffins


Author: Melanie

Recipe Source: Motherthyme


Ingredients


  • 2 1/2 cups all-purpose flour

  • 2 teaspoons baking powder

  • 1 teaspoon cinnamon

  • 1/2 teaspoons salt

  • 1/4 teaspoon nutmeg

  • 1 cup eggnog

  • 1/2 cup vegetable oil

  • 1/2 cup white granulated sugar

  • 1/2 cup light brown sugar

  • 2 large eggs

  • 1 teaspoon vanilla extract

  • (Eggnog Glaze)1 cup confectioners sugar

  • 3-4 tablespoons eggnog


Instructions


  1. Preheat oven to 400 degrees.

  2. Line 12 cup muffin pan with paper liners or spray with cooking spray and set aside.

  3. In a medium bowl mix flour, baking powder, cinnamon, salt and nutmeg.

  4. In a large bowl whisk eggnog, vegetable oil, sugars, eggs, and vanilla.

  5. Gradually stir wet ingredients into dry until combined.

  6. Pour batter about 2/3 full into each muffin tin.

  7. Bake for 14-16 minutes until cake tester comes out clean and muffins are firm on top.

  8. Cool for about 5 minutes in pan before transferring to a wire rack to cool completely.

  9. Eggnog Glaze

  10. In a medium bowl stir confectioners sugar and gradually add milk until mixture is thick yet can run off a spoon easily.

  11. Dip tops of muffins in glaze and set back on wire rack until set.

  12. Store in an airtight container.


Sunday, December 1, 2013

Kids in the Kitchen: Christmas Tree-ts


Hello friends!  How was your Thanksgiving?  Ours was great!  And we have wasted no time in getting up our Christmas tree and holiday décor.  I love this time of year!!  I will update the sidebar in the next day or two with lots of our most favorite holiday recipes.  I wanted to start off the season with these adorable little Christmas trees.  They make the perfect holiday treat for little ones. They are easy to prepare, so fun to make and relatively healthy:)  Perfect for class parties or after school snacks!  You will find these are  a big hit!  Children LOVE "decorating" their own little trees.  Yum!

Kids in the Kitchen: Christmas Tree-ts


Author: Melanie


Ingredients


  • Green Apple Sliced thin

  • Tootsie rolls, unwrapped

  • Cheese cut into a star with the tip of a knife

  • fruit loops cereal


Instructions


  1. Lay apples on a plate to form a tree (three to a side--see picture)

  2. Lay Star on top, tootsie roll at the bottom for the stump and decorate with fruit loops for ornaments. Enjoy!!


Thursday, December 20, 2012

Gingerbread Cookies


My friend, Jen Johnson, makes these yummy gingerbread cookies every Christmas. She even made them in the Fall too, in the shapes of maple leaves with pretty outlines piped along the edges. At Christmas time, she cuts them out using small (like, two-bite-size) gingerbreadman and snowman cutters.  They are soft and sweet, and a hit at any party. She says the best thing about them is that they freeze super well. So well, in fact, that they are actually softer after being frozen and then defrosted. I had fun making them for my preschooler’s Christmas party yesterday. I also delivered some to friends last night and one friend texted me when she found them on her doorstep, “These are too cute to eat!” J  They are cute and also yummy, so it’s a win-win! Hope you enjoy!

 Rolled Gingerbread Cookies


Submitted by Erin ~ The Sisters Café .com

1 cup shortening (I use butter flavored)
1 cup sugar
1 egg
1 cup molasses
2 T vinegar
4 cups flour
1 ½ tsp soda
½ tsp salt
1 tsp ground ginger
1 tsp ground cinnamon
1/4  tsp ground cloves

Cream shortening and sugar.  Beat in egg, molasses, and vinegar.  Sift together dry ingredients; blend in.  Chill at least 3 hours.
Roll dough ¼" thick on lightly floured surface. (I would highly recommend a silicone rolling mat. Mine is 24x16 inches.)


Cut in shapes.  Place 1 inch apart on greased cookie sheets (or a cookies sheet lined with a silicone mat or with parchment paper).   Bake at 375 for 5-8 minutes. The length of time depends on how large you cut your cookies. I baked mine for 7 or 8 minutes. Makes about 4-5 dozen.

To make icing:
Beat powdered sugar and a few Tablespoons of water together until it reaches a thick, non-runny consistency. It should be even thicker than molasses. Fill a frosting piping bag with the icing and use a Wilton size 3 or 4 tip. (Of course you can use a plastic bag with the corner snipped too. You won’t have the control that you get with a frosting tip, but it will do the job.)

Thursday, December 13, 2012

Snowman on a Stick


My little boy and I made these cute little snowmen on a stick for his preschool birthday party today.  I'm crazy and had two babies in December.  And one day apart no less!  Those of you with Christmas babies can relate.  We are very busy Mamas this time of year what with trying to make sure our little darlings' birthdays don't get beat out by holiday to-do.  This year I got lucky.  My 4 year old asked for a "Candy Cane Christmas Party."  I may not want his birthday to get beat out, but I am not crazy enough to argue with such a wonderfully easy request.  So I am planning a birthday party complete with fun Christmas and winter oriented activities and treats, and I am keeping everything as easy as possible.  Hence these adorable, easy, and quick birthday snacks today.  They were a hit with the preschool kids, and I loved that my little guy could help me make them for his class.  In fact, I am thinking Snowmen on Sticks will make a second appearance with some creamy hot cocoa after actually making a snowman this winter, too!

PS A few helps:

1.) We made these the night before, and the next morning all the Fruit Roll-Up scarves were gooey from sitting in a closed container with the moist donuts all night.  I had to put new scarves on all the snowmen before I could deliver them to preschool.  So scarves are a to-do on the day of.
2.) Also, I bought two boxes of donuts.  One was not as fresh and the donuts cracked when skewered.  The fresh, moist donuts did not crack at all when skewered.  So as always, fresh is best!

Snowman on a Stick


Author: Mindy


Ingredients


  • 10" bamboo skewers

  • Powdered mini donuts

  • Orange and Green Mike and Ikes, cut the green ones in half

  • Fruit Roll-Ups, cut into strips

  • Black Food Coloring, Black Icing Gel, or mini chocolate chips


Instructions


  1. Thread three donuts onto the skewer.

  2. Place the halved green Mike and Ikes into the center of the lower two donuts for buttons.

  3. Place one orange Mike and Ike in the center of the top donut for the nose.

  4. Wrap the strip of Fruit Roll-Up between the top two donuts for a scarf.

  5. Then dip a toothpick in black food coloring and touch to the top donut to create charcoal eyes and mouth (I've also tried the black icing gel, which looks cute but can smudge easier.  Mini Chocolate Chips work, too).


Recipe Source: Dukes and Duchesses

Monday, December 26, 2011

Gingerbread Waffles

How was your Christmas yesterday?   I hope it was Happy!  Ours was:)  We are in Utah staying with my parents.  Their home is literally bursting with family! It is a very merry place right now!  All the children are in heaven, getting to play all day with little cousins and sleep in sleeping bags each night!  How exciting!  It has been so fun to be all together again, chatting, eating our Mom's home cooking, playing games, holding each others babies, etc!  I am looking forward to more of the same this next week!  What are your plans for this lovely week between Christmas and New Years?  Well, if you are looking for a yummy holiday-ish recipe  for your family, I would highly recommend this one!

I made these waffles on a cold and blustery night a couple of weeks ago and they were perfect! So tasty for a cozy night at home and  I loved the way they made my home smell!  What a delicious dinner they made.  If you are fans of gingerbread, you will LOVE thsee waffles.  Such a fun recipe for this time of year!

Gingerbread Waffles
submitted by Melanie~The Sisters Cafe


2 cup flour
3  tsp baking powder
1 tsp ginger
1 1/2 tsp ground  cinnamon
1/2 tsp salt
1/4 tsp ground cloves
2/3 cups brown sugar
2 eggs, separated
1/4 tsp cream of tarter
1 1/2 cups buttermilk
1/2 cup molasses
6 Tb melted butter

Combine the first six ingredients in a large bowl and set aside.  Next combine the brown sugar and egg yolks until fluffy. then add the buttermilk, molasses and butter. Next combine the wet ingredients to the bowl of dry ingredients.  Be sure to stop mixing as soon as the batter is barely combined--Don't over mix! In a medium bowl whip the egg whites with the cream of tarter until they are light and fluffy.  Gently fold the egg whites into the batter.  Cook your waffles in a hot waffle iron according to package directions.  Enjoy!!

We like these with Connor's Bubbly Syrup ( Buttermilk syrup).  And they are amazing with freshly whipped cream if you have any:)

Thursday, December 22, 2011

Candy Christmas Trees for the Table


Some years, my boys and I make these little candy trees for our Christmas table. We place one next to each plate, along with a place card and this little poem:

The pure green color of the stately fir tree
remains green all year round,
depicting the everlasting hope of mankind. 
All the needles point heavenward,
making it a symbol of man's thoughts
turning toward heaven.


 I love all the symbols of Christmas and I am always looking for fun ways to teach my family what they represent.


We  hope you all have a very Merry Christmas!


Candy Trees for the Table
submitted by Melanie~The Sisters Cafe


Rollos, wrapped in gold
Miniature Reeses Peanut Butter Cups, wrapped in green
Hershey Kisses, wrapped in green

Start with a Rollo for the base of the tree.  Using some craft glue or a glue gun attach two Reese's peanut butter cups and a Hershey kiss to form a tree. Place one tree next to each plate along with the poem.

Wednesday, December 21, 2011

Candied Popcorn

I wanted to make some neighbor gifts yesterday, but I didn't have time to make and wrap individual caramels, nor make toffee and package it up, like I usually do.  So instead I whipped up a triple batch of this candied popcorn, scooped it up into bags, and tied it with a bow and our Christmas card. Viola!  This is a fast and delicious alternative to the classic candy-thermometer caramel popcorn that I usually make at Christmas time.  My friend Britni Hamblin brought some over a couple weeks ago, and I thought it was so delicious, and had such a pretty presentation, that I asked her for the recipe.  Thanks so much for sharing, Britni!

Candied Popcorn
submitted by Erin  ~ The Sisters Cafe


3 to 3 1/2 batches of air-popped popcorn (each batch is 1/2 c. unpopped corn kernels. So this would be the equivalent of 1 1/2 to 1 3/4 cups of unpopped corn kernels)
2 cubes butter (1 cup)
1 1/3 c. granulated sugar
1/2 c. light corn syrup

First, pop all your popcorn.  Shake the popcorn and then scoop the top layers into a couple large mixing bowls. Leave the heavy and/or unpopped kernels behind. (This is important so no one breaks their teeth on your popcorn. :) )
Melt butter in a large pan.  Stir in sugar and corn syrup. Stir until all the sugar is dissolved. Continue stirring, on medium-low heat, until the mixture is completely smooth.  (It may bubble once or twice, but don't allow it to simmer or boil; if it does then the caramel mixture will be harder when it cools, which makes for brittle popcorn instead of soft popcorn.)  Turn heat off.
Using a ladle, drizzle the sugar mixture over a portion of your popcorn.  Then mix it with a spoon, add another portion of fresh popcorn, drizzle the mixture over it, and stir it around, etc.  Continue until all your mixture is evenly distributed on the popcorn.   (You do not necessarily have to use all your popcorn.  If you use less (ie, 3 batches), it will have a thicker coating. If you use more (ie, 3 1/2 batches), it will have a lighter coating.)
I packaged my candied popcorn into gallon sized twist-tie bags I bought at the grocery store. Or you can store it in a tupperware for a few days.  Or serve it right away!  Enjoy!

Sunday, December 18, 2011

Double Chocolate Cupcakes with White Chocolate Frosting and a Candy Cane Dusting


These cupcakes are made from my all time favorite cake recipe Classic Chocolate Bundt. Have you made it?  If you haven't you should--it is amazing!   I simply took that batter and instead of using a bundt pan, I divided into two mini muffin pans.  They were very moist and made the perfect base for my favorite white chocolate/ cream cheese frosting.  For Christmas I added a dusting of crushed candy cane.  They were pretty and very tasty!  I got some little  red and white treat boxes from the Martha Stewart line at Micheals and the boys helped me deliver them to our neighbors for Christmas.  Then of course we came home and enjoyed some ourselves:)  They were a big hit with my family!  I think you will love them too!


 I can't believe Christmas is in less than a week!  How are your preparations coming?  We are busy wrapping gifts, making treats and blasting Christmas Carols!  I love this time of year!  After having a "tebowing" wiseman (at the church party-no less:)  I have decided this last week before Christmas I am going to help my little family understand the significance of the Nativity better with nightly devotionals/ discussions about each character.  More on that here--I am so excited:)


Merry Christmas friends!  Good luck this last week getting everything done on your lists!


Double Chocolate Cupcakes with White Chocolate Frosting and a Candy Cane Dusting
submitted by Melanie~The Sisters Cafe


1 devils food cake mix (Dry–don’t make it according to directions on the box)
1 -4 serving instant chocolate pudding mix
4 large eggs
1 cup sour cream
½ cup warm water
½ cup vegetable oil
1 ½ cups semi sweet chocolate chips-(I used mini chips for this)

Preheat oven to 350.  Place all ingredients except chocolate chips, in a large mixing bowl. Blend with electric mixer 1 minute.
Stir down sides. Continue to mix on medium speed for 2-3 minutes. Stir in chocolate chips. Pour batter into greased mini muffin pans.
Bake approximately 15 minutes at 350. Cool completely and frost.

White Chocolate Frosting:
8 ounces of cream cheese, softened
1 stick of butter, softened (8oz)
2 ounces of white chocolate, melted
1/2 tsp of almond or vanilla extract
3 cups powdered sugar

Mix butter and cream cheese together then add remaining ingredients. Mix well. Put frosting into a pastry bag and pipe on cooled cupcakes.

Finish off with a sprinkle of crushed candy cane or pretty sprinkles.

Monday, December 12, 2011

Christmas Eve Eggnog


One year for my birthday, a very thoughtful friend gifted me this fabulous recipe along with a nutmeg grater, and some nutmeg. This may seem like an unusual gift for a May birthday, but I was thrilled.  Sheri knew me well--it was perfect for several reasons!  First of all, she knew how I treasure a great recipe, plus a  new kitchen gadget will always excite me and last but not least I LOVE traditions!  I could hardly wait for Christmas to arrive that year so I could present this special treat to my family on Christmas Eve along with our traditional menu of Chicken a la King.    Of course my family loved it and new tradition was born! We have been serving it on Christmas Eve ever since!  I think our favorite part is that you serve it in a frosty cold punchbowl full of  vanilla bean ice cream scoops!  AMAZING!!  We look forward to it all year and there is never any leftovers!  This really is very easy to make and trust me--your family will LOVE it!

For more of our Christmas Traditions go here.
And I would LOVE to hear about your favorite traditional recipes or activites for Christmas!

Christmas Eve Eggnog
submitted by Melanie


2 qts milk (divided)
1 qy half and half
4 eggs, well beaten
1 can sweetened condensed milk
1/2 tsp salt
3 tsp vanilla
Fresh Nutmeg
Vanilla Bean icecream (1/2 gallon)

Blend eggs and 1 qt milk in blender.  Scald (let it reach 180 on a candy thermometer while stirring constantly)  Cool and then put in fridge overnight to chill.

Several hours before serving, put punchbowl in freezer.  Combine in large container the chilled milk and eggs mixture, 1 additional qt of milk, 1 qt half and half, vanilla, salt, sweetened condensed milk and sprinkle with FRESH grated nutmeg.  Chill in fridge.

When ready to serve, take chilled punchbowl out of freezer and scoop vanilla bean ice cream in rounded scoops in bottom of bowl.  Pour eggnog over ice cream.  Generously sprinkle on more freshly grated nutmeg andserve.   ENJOY this yearly indulgence:)

Recipe Source:  Slightly adapted from my sweet friend Sheri.  The only change I made is that right before she pours the eggnog over the ice cream she gently folds in 1 pint of freshly whipped heavy cream.  I like it better without the whippped cream--and with our traditional Chicken a la King and Christmas Eggs in the morning, I figure we are getting enough cream already:)

Wednesday, December 7, 2011

Salt Dough Ornaments


Making salt dough ornaments is a fun family tradition for Christmas-time that we do in our home.  The kids love creating these fun ornaments to give away as gifts to their school teachers, church teachers, and grandparents.  They feel extra excited to offer these special people a gift that they made themselves.  :)
Making these ornaments is very easy!  I hope you enjoy this with the children in your life!

Salt Dough Ornaments
submitted by Erin  ~ The Sisters Cafe


1 cup salt
2 cups all purpose flour
1 cup luke warm water (or perhaps a bit less)

Mix salt and flour together and add water. Mix well until dough forms a ball. If it is sticky, add a little flour. Knead in a standing mixer for 5 minutes, or until smooth.  (You may also knead it by hand.)  Empty dough on a floured surface and knead a few times until it is not sticky and can easily be rolled out.  (You can store the dough in an airtight container for a few days before proceeding.)

Roll out to about a 3/4 inch thickness. Using cookie cutters, cut out Christmas shapes.

Place on a greased cookie sheet and poke one hole in the top of each ornament using a chopstick, skewer, or straw. (Be aware that the hole will close up a little as the dough expands and bakes.) Bake in a 200 degree oven for 1 to 2 hours, or until dry. (Pictured below before being baked.)
For a family fun night, gather the family together and paint the dried and cooled ornaments. (I highly recommend Crayola Washable Kids Paint in 10 (2-oz each) assorted colors. You can buy them at Walmart for $5 or so, and they are much more washable than regular craft paints.) Even my little 21-month old loved this!

Tie a square knot around the holes of the ornaments using string, and attach green wire hooks (purchased in the Christmas isle at grocery/market store) to the ornaments so they can hang on a Christmas tree.
This year my 1st grader gave an ornament to his teacher at school, taped to a potted poinsettia with a handmade card and some homemade caramels.  He wrote on the back of his ornament with a black permanent Sharpie marker. He was very excited to give it to his teacher. :)

Merry Christmas, everyone! And have fun making these ornaments at home!

Monday, December 5, 2011

Gingerbread Muffins


Do you have any gingerbread fans in your house?  I do!  My family loves gingersnaps, and warm gingerbread cake with cream sauce, so when I came across this muffin recipe I knew I had to make them!  They were very good!  My family loved them and I loved the way our home smelled while they baked!  Yum! Perfect muffin for this time of year!

And I have a couple things to tell you --

First off--I am very sorry that I have not been posting my weekly menus the last few months!  I actually forgot about them since I put the menu tab at the top of Melandboys instead of doing it as my Monday post.  I had a couple emails requesting it and I am glad for the reminder!  Yes I will post my menus again and I would love to see yours too!  Send me a link at melandboys@gmail.com  if you have them posted!  Dinner inspiration is always appreciated!

Last but MOST IMPORTANT--my old neighbor and sweet friend has created a beautiful online boutique this Christmas called The Good Bird Design and all the proceeds go to an orphanage in Ghana.  The products are all handmade and the craftsmanship and detail is amazing---but the best part is that these gifts you purchase from their store have the added gift of helping babies in Africa who desperately need it!  I hope you will take a look and do a little Christmas shopping there this week! This is the last week they are doing it and what a wonderful cause!


Gingerbread Muffins
submitted by Melanie~The Sisters Cafe


1/4 cup packed brown sugar
1/2 cup molasses
1/3 cup milk
1/3 cup vegetable oil
1 egg
2 cups all purpose flour
1 tsp baking powder
1/2 tsp ground ginger
1/2 tsp salt
1/2 tsp baking soda
1/2 tsp cinnamon
1/4 tsp allspice

Glaze
Mix the following together until desired consistency is reached:
1 TB butter softened
1 1/4 cup powdered sugar
2-3 TB milk

Heat oven to 400.  Grease bottoms only of 12 regular size muffin cups or place a paer baking cup in each muffin cup.

In a large bowl beat brown sugar, molasses, milk, oil, and egg with spoon (or use a mixer).  Stir in remaining ingredients just until flour is moistened.  Divide batter evenly into the muffin cups.

Bake 18-20 minutes or until tooth pick inserted in center comes out clean.  Immediately remove from pan to wire rack to cool.  Drizzle powdered sugar glaze over top.  Enjoy!

Recipe Source: slightly adapted from the Betty Crocker Christmas Cookbook

Monday, December 20, 2010

Warm Gingerbread Cake with Cream Sauce


I had a hard time taking a picture of this dessert that would do it justice. You will just have to take my word for it, that it was AMAZINGLY delicious! My husband said it was his new Christmas favorite. We loved it warm right out of the oven. It was an added bonus that baking this made my house smell wonderful. I think you could add a dollop of freshly whipped cream on top, if you wanted to (I am going to do that next time). I can't remember who gave me this recipe, but I am so glad that I finally got around to trying it out. It really was fantastic! A perfect dessert for a holiday gathering! Merry Christmas!

Gingerbread Cake with Cream Sauce
submitted by Melanie

1 cup sugar
1/2 cup butter, softened
2 cups flour
2 tsp ground ginger
2 tsp ground cinnamon
1 tsp ground allspice
1/2 tsp salt

Mix until crumbly. Reserve 1/2 cup of the above mixture for the streusel topping. To this, add 1/2 cup chopped pecans, if desired.

To the remainder, mix in

1 tsp baking soda
1 cup buttermilk
1/2 cup molasses
2 eggs

Pour batter into a well-greased 13x9 baking pan. sprinkle with the reserved streusel topping. Bake at 350 for 28-30 minutes, or until toothpick comes out clean. Watch carefully so you don't overbake. Let cool slightly, and serve warm with Cream Sauce.

Cream Sauce
1 cup sugar
1 cup heavy cream
1/2 cup butter
dash ginger

Combine and bring to a gentle boil over medium heat. Stir 4 minutes. Serve and warm sauce over gingerbread. Refrigerate any remaining sauce.

Thursday, December 16, 2010

Christmas Dinner Party with Molten Lava Cakes

I have discovered that I love to throw a dinner party! I am in a dinner group with 7 other women that love to cook. We each a take a month and host a dinner for the rest. It is the best organized group thing I have ever done with friends - seriously! It was a genius idea (although not mine)... I mean, what can be better than going to a friend's house and being served a delicious meal and not having to lift a finger... or pay a bill! And the best part is you get to enjoy it amongst some of your favorite people. I was loving being the guest so much, I had no idea how much I would enjoy being the hostess!! I had a great time setting and decorating the table and planning the menu. I thought it would be fun to post it here for you all to look over. (Click on the links to see pictures...I was too busy that night to take pictures of the food!) Who knows, maybe there are a few of you out there that need some menu ideas for a dinner party? I liked this one because it was a good mix of simple, elegant and fun.

Christmas Dinner Party Menu
submitted by Brittany

appetizer: Holiday Brie en Croute

dinner: Cranberry Pork Roast

Fresh Green Beans with Honey Cashew Sauce

Roasted Root Vegetables

Buttermilk Rolls with Homemade Strawberry Jam

dessert: Molten Lava Cakes served with vanilla bean icecream


Since almost all the recipes are on the blog, I just posted the links... except for the decadent dessert Molten Lava Cakes. Oh wow. That is all that needs to be said. It is my own twist on this usually darkly delicious dessert. I like it just a smidgen sweeter and a little more fudgy rather than cakey.

Molten Lava Cakes
(adapted from The Neelys recipe on foodnetwork)
submitted by Brittany at The Sisters Cafe
 
1 cup butter (2 sticks), plus more for ramekins
4 tsp sugar (for sprinkling in ramekins)
1/2 tsp cinnamon
pinch cayenne pepper
pinch nutmeg
1 cup semisweet chocolate chips
1 cup milk chocolate chips
1 cup flour
2 1/2 cups sugar
4 extra large eggs
5 extra large egg yolks
2 tsp vanilla extract

Preheat oven to 400 degrees. Butter 8 (6 oz) ramekins and sprinkle each with 1/2 tsp sugar.
In a saucepan combine butter, spices and chocolate over low heat until melted and smooth; stirring frequently. Cool slightly.
In a large bowl whisk together flour, sugar, eggs and yolks, and vanilla extract until creamy. Add melted chocolate to the batter and whisk together. Pour into prepared ramekins.
Bake cakes until the top is stiff and cracked and the edges are dark, about 12-14 minutes. Remove from the oven and let cool for 5 minutes. Loosen the edges with a small paring knife then invert onto plates while warm.
*If you over bake these cakes, they will not have a molten center. It will be more like a brownie. Hardly worth all this effort for a brownie!! So make sure you don't bake them too long.

Eggnog Thumbprint Cookies

If you are a fan of eggnog then these cookies are for you! I have some serious eggnog fans in my house and they LOVED these little babies. I made half of them plain (no nuts) and my family preferred them that way. Next time I will double the recipe and not roll them in nuts. It is interesting that there is actually no eggnog in the recipe, but it sure tastes like there is. These cookies are fun, unique and super tasty!

A perfect addition to your holiday baking!

Eggnog Thumbprint Cookies

submitted by Melanie

2/3 cups butter
1/2 cup sugar
1/8 tsp nutmeg
2 egg yolks
1 tsp vanilla
1 1/2 cup all purpose flour
2 slightly beaten egg whites
1 cup finely chopped walnuts (I used almonds)

Filling
1/4 cup butter
1 cup powdered sugar
1/4 tsp rum extract
2-3 tsp milk


ground nutmeg for garnish

Beat the 2/3 cup butter in a mixing bowl for 30 seconds. Add sugar and 1/8 tsp nutmeg; beat until combined. Beat in egg yolks and vanilla. Add flour. Cover and chill one hour. Shape into 1" balls. If desired roll balls in egg whites, then in chopped nuts. Place on parchment paper, silpat or slightly greased cookie sheet. Press centers with your thumb. Bake at 375 for 10 minutes. Cool

For filling: Beat the 1/4 cup butter until soft, then add the powdered sugar until fluffy. Add extract and enough milk to make it smooth. Place a small amount of filling into each cookie and sprinkle with nutmeg. Makes 2 dozen cookies.

Recipe Source: Stephanie M.

Tuesday, December 14, 2010

Great Grandma's Shortbread Cookies & Fondant Frosting

**Winner of the Tate's Bakeshop Cookies and Cookbook Giveaway**
Congratulations to FALLON who wrote, "I would love to win the cookies and the cookbook. It sounds like a nice giveaway!"
Email me at melandboys@gmail.com and we will get your package on the way!

And now, let's talk Shortbread Cookies!

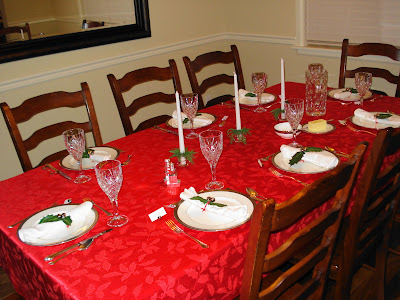
When we were growing up, we had so many Christmas traditions, and I loved it! On Christmas Eve, when we had Chicken a la King, we would each have a small red candle clipped to our plate, and a garland napkin ring with a sprig of holly in it. After dinner we always sang carols, read Christmas stories and watched George C. Scott in The Christmas Carol, with trays of homemade candy and shortbread cookies. And of course we read the Christmas Story from Luke 2, out of the beautiful bible that our mom bought in Jerusalem when she was a young adult. These traditions made Christmas even more special, exciting, and unifying.
Isn't it neat to think that special family traditions can be passed down for generations? This recipe for Shortbread Cookies and Fondant Frosting, for instance, is our Great Grandma's recipe, and so our family has been making these at Christmas time for years and years and years. Although this recipe is special for our family, sharing it only spreads the happiness!
And, by the way, you'll be glad to know that I've updated the directions. :)
(PS. Don't be turned off from the fondant frosting because you are familiar with that bland store-bought variety. This homemade fondant is smooth, sweet, and bursting with delicious flavor.)

Great Grandma’s Shortbread Cookies
Submitted by Erin ~ The Sisters Cafe
Printable recipe here

4 c. flour
1 c. powdered sugar
2 c. butter
About 1 tsp vanilla extract (or almond, but I prefer vanilla because I add almond extract to the fondant frosting)

Combine flour and powdered sugar together in the bowl of a food processor fitted with a steel blade. Chop four cubes of butter into slices and drop into the bowl. Pulse processor until the butter is the size of peas. Add extract and pulse a few more times. It will look like this:

Dump flour/butter mixture into the bowl of a standing mixer. Using the kneading attachment, knead on speed 1 for a minute and then increase to speed 2. The flour mixture will take shape and turn into a thick dough. Mix until the dough is lumped together and cleaning the sides of the bowl, and appears smooth.
Chill for 20-30 minutes for easier handling, and then roll it out using a silicone baking mat and a lightly floured rolling pin. (A silicone baking mat prevents dough from sticking to the flat surface and eliminates the need to flour your surface. This is good because every time you flour your surface, you add flour to your dough and decrease its quality.)
Roll out to desired thickness (1/4 inch to 3/8 inch) and cut out cookie shapes using Christmas themed cookie cutters.

Place cookies on lightly greased cookie sheets. Bake at 375° for about 10 minutes. Duration will depend on how thick the cookie dough was rolled out. Check after a few minutes and be sure to remove from oven as soon as the edges have a hint of gold. (Only the edges should turn a pale gold. Do not wait for the tops to look golden or you will have overcooked cookies.) Frost with fondant. This recipe makes 3 or 4 dozen cookies.

Fondant Frosting for Shortbread Cookies
The Sisters Cafe

3 c. sugar
½ c. heavy whipping cream
½ c. water
2 Tb Karo syrup (light corn syrup)
1/8 tsp cream of tartar
½ tsp vanilla or almond extract (use the opposite flavoring as you used for the short bread cookies; I always add vanilla to the shortbread and almond to the fondant)
Extra cream or milk (to create a spreadable frosting consistency at the end)

Place liquids (½ c. cream, Karo syrup, and water) in a heavy large pan. Add sugar carefully in middle, creating a pile of sugar. Turn stove on low and carefully stir the sugar into the liquid without touching the sides of the pan. Continue to carefully stir until mixture comes to a boil. Turn on high and stir until it reaches the soft ball stage (my thermometer says soft ball is 240°, but I took it to 245°). The longer it cooks the more sugar will caramelize and turn the fondant brown, so cook as quickly as possible for a white finished product. Remove from heat and do not stir again.  Pour fondant into a buttered 9x13-inch glass pan. Do not scrape out the cooking pan! Cool until the bottom of the glass pan is barely warm to the touch and the fondant is not hot anymore.

Scrape the fondant out of the glass dish and into the bowl of a standing mixer. Turn on speed 1 for a few minutes, and then to speed two. (I used the kneading attachment at first and switched to the beaters at the end. You could probably use either of them successfully if you are using a Bosch. It is quite thick, so other mixers might have a difficult time kneading/mixing it.) The fondant will start out with a clear, glossy, and caramel-like texture and will turn to an opaque, white, and crumbly mixture. At this point, continue beating/kneading until it turns smooth again; it will be white and glossy looking, but it will be thick enough to collect on the beaters, as shown.

You can add the flavoring extract at this time by forming a well in the middle and kneading it again for a little while, or you can divide the fondant and use different flavorings to the separate containers. (½ tsp almond extract will give it a strong almond flavoring, which I love, but if you would prefer a more subtle flavor, use less.) If you are not frosting the cookies immediately, refrigerate the fondant.
Once you are ready to frost cookies, bring the fondant to room temperature and add a few Tablespoons of cream (or milk if you wish). Stir to desired frosting consistency, adding more cream, a little at a time until you have the desired consistency. (It starts out quite thick, but just keep adding a little cream or milk until it is a spreadable consistency.) Divide into bowls and add food coloring to each bowl (I use Wilton concentrated paste sold in 1 oz containers). You can add a small amount of flavoring at this time if you didn’t add it earlier.
Frost cookies using a knife to smooth the fondant on top of the cookie. It will turn glossy when you let it sit for a moment afterward. Fondant frosting will go further than you think! Store leftovers in the refrigerator.

*Want to know what our Mom always did with the fondant leftovers? She would roll the white fondant into small balls and dip them in chocolate. Then she served the round chocolates with almond fondant filling on a tray with our other Christmas goodies. Yum!

Friday, December 10, 2010

Gingerbread Sleighs


This is one of my favorite Christmas traditions! This one actually came from my husband's family. Every year growing up, his mom would make these gingerbread sleighs for him and his siblings to decorate together. They all have fun memories of creating masterpieces with each other. I couldn't wait to get in on the action!  Soon after we got married, one of his sisters, Emily, typed up the family recipe and gave everyone copies, so we could continue the tradition in our own homes. We love it!

Every year we buy a bunch of candy and set aside one night to decorate our Sleighs. A few days before, I make and roll out the dough (using a silicone baking mat (such as Silpat) makes your job a lot easier). I take my paper pattern pieces (you can print the page out and cut out the patterns) and lay them on the rolled out dough and cut around them with a sharp tipped knife. Then I bake the Sleighs parts and let them dry out for a day or so. The night before we decorate them, I assemble the Sleighs using the frosting in a piping bag. When this frosting dries, it gets very hard, which is great for assembling and decorating.  This recipe will make 6 seighs. The next evening we put our candies into different bowls and make a piping bag of frosting for each person. Our favorite decorating candy are the mini M&Ms; they are the perfect size! Of course you need a variety of candies, though. I regret that the Sleigh pictured is so boring; I wish I could show you some of my husband's creations. He makes winter scenes out of skittles, and holly wreaths out of sculpted Starbursts... his Sleighs are always awesome!  Be sure to buy a pack of candy canes for the sleigh runners. I forgot to do that last year and my husband was appalled that we would not have runners on our sleighs!  (Clearly I'm a beginner at this tradition! :) As you can see in the picture, we had to make do!) After our sleighs dry, we fill them up with homemade candy and deliver them to neighbors and friends.

What a blast!  I hope some of you will have fun with your families making Gingerbread Sleighs this month. :)

Happy Decorating!


Gingerbread Sleighs

Submitted by Erin  ~  The Sisters Cafe

Printable recipe here


Pattern for Sleighs here (Print this out on a scale of 150%, so that it fills the whole 8x10 page with only small margins.)


Gingerbread Dough

7 c. Flour

2 t. Baking Soda

1 t. Salt

1 t. Ginger

1 t. Cloves

1 t. Allspice

1 t. Cinnamon

1/3 c. Shortening

1 c. Brown Sugar

1 ½ c. Dark Molasses

2/3 c. Cold Water


Decorating Frosting

3 Egg Whites, Room Temperature

1 lb Powered Sugar (3 ¾ c.)

½ t. Cream of Tartar


Dough: Stir together dry ingredients and set aside.  In a large bowl, beat shortening, brown sugar and molasses until well combined.  Stir in water.  Beat in flour mixture gradually.  When dough becomes stiff, work in remaining flour mixture with wooden spoon, or hands, mixing well.  Wrap and chill dough for several hours.  (I do it overnight)

Print out the pattern for the sleighs. When you click on the link, go to the "scale" box at the top of the page, and select 150%. This should enlarge the picture so that it fills the entire 8x10 page, with only small margins. Print it off and cut out the paper pattern pieces.

When you are ready to cut out the gingerbread sleighs, divide dough in thirds.  Roll out on floured surface to ¼” thick.  Place pattern on dough and carefully cut out with small pointed knife. The recipe will make at least 6 sleighs, maybe more if you roll it thinner. For each sleigh you cut out one small rectangle piece, one large rectangle piece, and two of the large sleigh side pieces- but you need to flip the pattern over on the second sleigh side piece so the two of them are mirror images of each other, so one can be a left side and one can be a right side of the sleigh.  Place pieces on greased and floured cookie sheets and bake 15 min at 350 degrees.  Cool on cookie sheet, then remove carefully to racks and let stand several hours to dry out.  (Once again, I let these sit over night)


Icing:
Beat 8-10 minutes or until medium stiff peaks form.  Keep bowl covered with dampened towel so that icing does not get hard.


To assemble:
Assemble the sleighs about 1 hour before decorating or the night before.
The small rectangle goes in the front, on an angle coming out, and the large rectangle goes in the back, also on an angle going up and out. There is no bottom to the sleigh.
Pipe a line of icing down the edges of the rectangles and press them against the inside of the large sleigh side pieces. You can put a rubber band around them while they are drying to keep them together, or you can stabilize them by leaning them up against something to dry.  

Decorate: With icing, attach a 6” candy cane to each side at the bottom to form runners. Decorate with any candy that dresses it up, fill with goodies and give away! It’s good to let it dry overnight before giving it away.


(I like to use the small size of Wilton goody bags with the silver twist-ties for the candy bags. I buy them at Michaels.)

Note: For quick repairs in case any candies or decorations fall off during the holiday season, wrap a pastry bag filled with a small amount of icing in a damp paper towel and place in a plastic bag.  Store in the refrigerator.

Thursday, December 9, 2010

Holiday Dinner Menu for 35

This year I was asked to organize the dinner for our Relief Society Christmas service activity. The women were coming to sew Christmas stockings and baby blankets, make jewelry, and an assortment of other creative things to ensure that a group of people that were suffering during this holiday season would each have at least a stocking full of small gifts. Dinner was not the focus of the evening, but nevertheless, I wanted it to be special for all these wonderful women. We were on a very tight budget so it took me some time to figure out what to serve that was delicious yet fairly simple. In the end it came together beautifully and everyone loved the meal. Since I'm sure there are some of you out there that are in the same situation of needing to orchestrate a meal for a large group... I thought I would share the menu and save you some hassle! Have fun! ~Brittany

Christmas Dinner Menu ~ serving 35
*4 recipes (with a total of 100 bread crowns)
Mixed Green Salad with Cinnamon Roasted Pecans and chopped apples
*One container of Spring Mix from Costco (10 cups), 6 Romaine lettuce hearts, 4 Braeburn apples, 4 cups of cinnamon roasted nuts (one recipe-click on link)

served with dressing from Chicken Poppy Seed Salad
*one recipe of the dressing

Eggnog Bundt Cake with Caramel Sauce
*3 cakes cut into 12 pieces each (click on link for recipe). Double, don't triple, the sauce - it makes a lot!

The church gym was not the best place for photos...and I wasn't about to tell everyone to move aside for me to get a good angle either but here is my best shot! :)

This entire dinner cost only $70 and that included all the main or unusual ingredients for the recipes. If you have more money available to you, I would add cheese to the salad (gorgonzola or even mozzarella would be delicious) and vanilla bean icecream would complement the eggnog bundt cake wonderfully.

Tuesday, December 7, 2010

We posted a few of our Christmas Favorites on our left sidebar.  This is the time to make decadent Caramels, Turtles, Toffee, and Chocolate Covered Nuts, warm Cranberry Wassail and delicious Eggnog Bundt Cake... Yum!  As for Christmas Eve, we had Chicken a la King every year since we were small. This dish means "Chicken for the King" and it is served in bread "crowns". It is a fun and memorable way of celebrating the birth of our King. And for breakfast on Christmas morning, try our Christmas Morning Eggs. Truly wonderful!


Click here for all of our Christmas favorites.


Keep posted for lots of more Christmas Season recipes to come!
Isn't this the best time of year?!